Autodesk Maya Tutorials
Autodesk Maya Tutorials – Autodesk Maya 3D modeling tutorials & Mental Ray rendering tutorials, tips & tricks, sites, resources, plug-ins, models, meshes, cartoon and photo realistic texturing & UV mapping, animation, Paint Effects – hair, compositing, education, lessons & special effects training.
# | A | B | C | D | E | F | G | H | I | J | K | L | M | N | O | P | Q | R | S | T | U | V | W | X | Y | Z
3D Paint Tip by Alex Alvarez. Ok, this drove me nuts for a good week… If you are using a 3D paint package to paint texture channels of a multi-patch NURBS model, you may find that when you import your textures, your edges display artifacts when rendered. Make sure that Wrap U and Wrap V are off for all of the 2DPlacement nodes in your scene. If you are painting Bump, make sure that Adjust edges is turned on for the Bump2D node.
The Zen of Lead & Follow
The Context of Animating Forces Instead of Forms
Keith Lango 8-25-04You guys ever play Follow the Leader when you were kids? One kid does something, the other kids follow along? The leader kid goes out into the yard and the rest tag after him like a conga line. At the foundation of good animation is a bit of this Follow the Leader thing. Problem is a lot of us don’t see it and it shows in our work. Follow along as I unfold the tale…
Preston Blair phoneme series. I’ve often looked for good examples of 3D phoneme mouth shapes; but there isn’t that much material available out there publicly – It’s about time someone uploaded some. So, here goes :o) Extended Preston Blair phoneme series.

Animation – Rigid Body Collision Detection
This tutorial shows you how to detect collisions between rigid bodies and how to use the data to drive your animations – welcome to the land of rule based animation. I’ll assume you are familiar with the basics of rigid body dynamics (setup, attachment to fields etc.) – if not, please consult the manuals
Rolling Ellipse PT.1
This tutorial shows you how to roll an ellipse on the floor, using Maya expressions. Have no fear, I won’t go too much into mathematical details here, but will provide you with ready to use expressions for copy and paste. If you really want to dive into the wonders of elliptical calculus, you’ll find the links to sites I used to obtain the mathematical background information at the end of this tutorial. I’ll assume you are familiar with basic Maya workflow (expression editing, geometry creation, etc.) and some basic math, your angular unit should be “degrees”.

Animation – Rolling Ellipse Pt.2
Rolling Ellipse PT.2 – Wacky Vehicle
While you have learned in the rolling ellipse tutorial how to roll an ellipse on the floor, we will now use this expression to build a funny moving vehicle. As I am no artist I won’t focus on modelling issues, but on the math to make this little thingy move.
This tutorial was written by Chas Jarret and involves animating a yoyo with the attached string wrapping around the fingers of a deforming hand. It contains some interesting techniques for solving the problem of realistic string movement between the hand and yoyo and also, an ingenious solution for getting the string to seemingly twist and wrap around the cg fingers.

API – Maya Help Page
Maya API Help Page by Michael B. Comet. This page is for use with people interested in developing Maya Plugins. It has some basic information and sample code for the Maya SDK that may be of use to C++ programmers.

API – Maya How To
Long list of tutorials on Maya API by Bryan Ewert.
More and more, cold weather scenes are being shot in mild climates, or in enclosed studios for budgetary, temporal and comfort reasons. Since the climate on these shoots is not cold, we lose the little natural nuances of reality. Therefore, it becomes incumbent on the special effects department to add these little nuances to add to the scene’s overall believably. One major nuance to contend with in such a shoot is the visibility of breath vapor when an actor or animal exhales in the cold climate. To that end, it has become the job of the soda caffeine-addled animator to add digitally created breath vapor to these actors or animals to further the illusion need for the scene.
Begin creating an emitter by going to the Dynamics module of Maya, and then selecting Particles>Create Emitter. By using a directional emitter, he’ll be able to control the direction of the particles and their cone of emission. He sets the direction to 0,1,0 so the particles will be emitted up, in the Y direction.
The intent of my tutorial is to give users a basic approach on how to create realistic procedural clouds within Maya 3.0 using particle clouds, at affordable rendering times. I added some possible variations to the main look and some Photoshop/AfterEffects compositing tips at the end of the document. I based the tutorial on a default Maya project. I added some extra notes for beginners anywhere I found it helpful.
Kurt takes us though this tutorial covering cloth. You will make a shirt for your character and learn many of the basic functions. A great video for anyone wishing to explore cloth.
This article focuses on shading and texturing the Mini Cooper, I’ll talk a little about rendering with Mental Ray but I think other people have covered that in more depth elsewhere.
DOF (Depth Of Field) Lens Shader The following tutorial shows the use lens shaders with Mental Ray for Maya.
By Alex Alvarez. To generate a realistic candle flame, the first thing to do, of course, is to light a candle and stare at it. What should become evident are some of the behavioral and visual elements which define its appearance. In terms of Maya lingo, a flame looks more like a transparent, incandescent surface than a nebulous object made out of thousands of particles. Flames have feathered yet hard edges, a very smoothly gradated interior, varying transparency and fluid behavior more akin to liquid or fabric than gas.
Simple Fog, by Darrin Krumweide. Simple fog is the basic environment fog settings used when creating fog effects in Maya. As with any environment fog type, Maya creates a volumetric material. In the case of simple fog attributes, the clipping distance can be adjusted as well as the height, saturation point and color.
Controlling Fog Density, by Alex Alvarez. Fog is a term often used to represent a variety of natural phenomenon within a 3D renderer. In nature, fog consists of water vapor yet in Maya you may use ‘fog’ to also represent dust, smoke, air, smog, plasma, nebulae or even magical glows and spells. To be able to yield such a variety of effects from fog, one must have a clear understanding of the volume shader associated with it. Specifically, our focus in this discussion is ‘light fog’, not volume primitives or environment fog. These are related topics, yet they use different nodes and are for another discussion.

Global Illumination Tweaking Guide
Global Illumination Tweaking Guide 1 Rather than starting off with a scene and tweaking until we have a nice look, I will start with a scene that is as good as I can get it, then I will experiment with changing some of the settings. The errors / artifacts introduced will hopefully help you when you see them, you’ll know what’s causing them and know what options to change.
While Gravity and Uniform have different default attribute settings, they can yield identical behavior with a couple attribute changes. Gravity, by default, accelerates particles along the negative Y-axis. The field also has the same effect on particles anywhere in worldSpace, regardless of the location of the field. Uniform, on the other hand, accelerates particles along the positive X-axis. Particles which are closer to the field accelerate faster than those which are further away.
A light probe is an omni-directional (360° panoramic) high-dynamic range image. Because they ‘see’ in all directions and can record actual light levels, light probes are useful for providing measurements of the incident illumination. As such they can be used to provide interesting and realistic lighting environments and backgrounds for rendered graphics. This tutorial describes how to create a light probe using HDRShop.

High Dynamic Range Radiance Maps from Photographs
Film cameras were developed in order to record light so that it could be reproduced on photographic paper; digital cameras so that it could be reproduced on a computer screen. Neither computer screens nor paper can display nearly the dynamic range (ratio between dark and bright regions) as what is present in the real world, and as a result cameras are not designed to capture even close to such a range. However, by taking a series of pictures with different exposure settings the range can be covered. With this technique such a series of images can be combined into a single high dynamic range image called a radiance map.
Tweak your hdrs / Synthesised hdrs. It’s always the question how good a hdri is and if you can use it in a smart way in your 3D app. At the moment everyone want very high sized hdrs which can be used as a BG image of a rendering too, but IMHO it’s better using a smaller hdr which uses less memory and use a high size and easy to create LDR image for BG images. I also think that blurring a hdr is a good way to reduce flickering in animations.
My favorite head modeling tutorial… By Dave Komorowski. First off you should have a side and front view of the object (sometimes top too, but I don’t need one in this case because most of my detail can be defined in the front and side). When creating these pictures it’s a good idea to use graph paper so that you can make sure your detail is lined up horizontally.
Having never found a detailed article about light on the internet I decided to write this one. Most of what I say here is based on my own observations, so there may be the odd inaccuracy. It may be that this stuff is so obvious that it doesn’t need explaining, however that does seem unlikely to me since careful observation of the world around is required you to realise exactly how light behaves in different situations.
Light Linking in Heavy Scenes, by Alex Alvarez. A crucial technique to successful lighting is the process of light linking. The process of simulating reflected light is very much achieved by exclusively associating lights with objects. Yet new lights are automatically linked to all surfaces in the scene.

Lighting – Advanced Lighting Techniques Part 1
If you wish to only use standard lights, the following method is necessary to make the scene look more realistic and detailed. In this tutorial I will show several examples to guide you though the process of simulating advanced realistic lighting. The most important thing however is to first make your own observations of lighting in photographs. Advanced Lighting Techniques Part 2.
The overall thrust of this writing is to produce photo-realistic images by applying good lighting techniques. I will use Lightwave 3D to demonstrate the lighting techniques used, but these techniques can be applied in any 3D software.
Lighting In Layers – By Jeremy Birn. The color and shading of the backdrop is very important to the perceived look of the ant in the final rendering. Even without the ant appearing in this rendering, you can already get a sense that it is going to be red and translucent.

Lighting -Semi-Outdoor Lighting
The semi-outdoor lighting uses a similar technique to the interior lighting in my previous tutorial. The semi-outdoor is slightly different in that the opening is bigger and divided by columns.

Lighting – Three-Point Lighting
Three lights: the Key Light, Fill Light, and Back Light, are adjusted to achieve the classic Hollywood lighting scheme called three-point lighting
Creating low poly hair for game characters using lots of images and some printscreens directly from the application used ( Maya, Photoshop etc…). The idea for this tutorial came from the polycount forums; for the Dominance War II contest i joined Polycount team and the folks there asked me if i can make a little tutorial about Varga’s hair so here it is…
Extensitve list of Maya Embeded Language (MEL) how to’s and how do I’s by Bryan Ewert.
MEL Recipe by Zhang Jian. These notes are intended to explain the basic ideas about MEL scripting by providing a series of examples, giving a recipe for MEL scripting that you can refer to.

Modelling – Female Character (Comic)
This approach can also be adopted when creating subdivision surface models. Start with good reference material and use as much as you can. Using your reference as an image plane, block out the rough shape of the character using cylinders. When adding finer details make sure to follow the muscle lines strictly. You must end up with a nice clean model, symmetrical where possible. Try and keep to a grid system, this will give you a neat model to work with, and result in better deformation. Do not put polygons where they are not needed, even if this is to be a high-resolution model.
Model a Giraffe from a Polygonal Cube. In this tutorial you will learn how to start from a polygonal cube using Maya, and extrude the faces to create a giraffe, you will use the Append to polygon to re-create deleted faces, and Subdivide and Split tools to split a face into more faces, and more… The tools are fairly simple, and the tutorial is great for beginners…
What is Continuity? by Alex Alvarez. Continuity applies to both curves and surfaces. It simply refers to how two curves meet at a point, or how surfaces meet at an edge. When using a patch-modeling approach, where a character, vehicle or whatever are modeled from a series of patches, like a quilt, one wants to avoid visible seams between the individual patches.
Kurt shows you how to create this cool looking cartoon dog – Starting with the image planes and moving onto the modeling which covers nurbs, polygons and sub divs.
*My favorite head modeling tutorial… By Dave Komorowski. First off you should have a side and front view of the object (sometimes top too, but I don’t need one in this case because most of my detail can be defined in the front and side). When creating these pictures it’s a good idea to use graph paper so that you can make sure your detail is lined up horizontally.
How to to Add Motion Blur to your 3D Animation in Post Production by Creating 2D Motion Vectors in Maya. This is a four-part tutorial about adding motion blur to a Maya render by first creating a 2D motion vector sequence and then using it with ReelSmart Motion Blur in post production. I’ll be covering Maya 2009’s 2D motion vector pass as well as installation and use of the lm_2DMV shader for earlier Maya versions. Once this technique is part of your pipeline, it can be a tremendous time saver compared with creating (and waiting for) motion blur from within Maya. It also provides the flexibility of applying any amount of motion blur without having to re-render.
Multi-Tile UV Mapping & Displacement
This multi part tutorial is designed around Maya and Mudbox. Several of the concepts here can be transposed into other 3d software packages that have UV grid control. It covers multi tile UV mapping, painting in Mudbox, shader setup rendering in Maya and displacement mapping ans shader assignment. Part 1: Multi-Tile UV Mapping | Part 2: Multi-Tile UV Mapping/Multi-Tile Painting in Mudbox | Part 3: Multi-Tile Shader Setup/Rendering in Maya | Part 4: Multi-Tile Displacement Mapping/Shader Assignment
So why Paint Effects? Pfx is a very effective tool suited for creating hair, it gives you ultimate control on exactly how you shape your hair, with no texture painting/alpha maps and requires less time to setup than other methods. Changing the looks of your hair can be done on the fly with instant feed back. It is very faster to render, takes very little memory. The render that appears on the above image will take no more than 30 seconds on a 1Ghz machine.
In this tutorial I’ll discuss two methods used in “Emeila” for making long hair for the characters. The first is based on guide curves that determine the basic shape and flow of the haircut. Paint Effects hair is then interpolated between the guide curves. It sounds complicated, but really it’s pretty simple. I’ll walk you through the basics here.

Particle Emission when Objects Collide
By Alex Alvarez. A commonly needed effect is the emission of particles at the exact location of object collision. For example, as a sword scrapes along a wall we may need sparks; As a boulder rolls down a mountainside we may need smaller instanced rocks and pebbles to appear; As a character walks along a dirt road we would expect dust to appear at his feet.
Björn Henriksson and I have written a small but neat MEL script that hooks your particle system up with a camera automatically, resulting in a z-depth/focus depth/height/age/etc shader, that can be used to render images meant to serve as an aid during compositing. This way you can e.g. render out hardware particles’ depth channel with motion blur. The script has been tested on Maya version 5.0 and 6.5 and is available for download
Using Particle Speed, by Alex Alvarez. There are situations where a phenomenon’s velocity or speed is related to it’s behavior or appearance. Perhaps the incandescence increases as a particle moves faster… or the color changes from blue to red. Perhaps some dust is resting on an object, but once it gets blown away it also begins to dissipate and fade. These effects can be achieved by understanding how to reference particle speed, which is not a default particle attribute.
Rendering in Passes and Layers by Alex Alvarez. An issue which is often overlooked or avoided by individuals new to 3D is the necessity of fine-tuning projects in conjunction with a compositing package. Yet the level of interactive flexibility available within just about any 2D application can save precious time. While it is possible when working on full CG projects to render the final image directly from the 3D rendering engine, this methodology is rarely utilized in production environments.
Curves with History on Polygons. The trick I use is to attach models to a path curve derived by extracting curves with construction history from deforming nurb models. Very simple and useful expecially if you forget to bind obj detail, like some buttons, to a deforming character, or if you want to avoid some tedious cv weighting for small added elements, while in a deadline crunch.
The purpose of this tutorial is to achieve a better functioning Inverse Foot setup. The Inverse Foot structure is built to give your character a better tool to avoid the foot from slipping on a ground plane and also to improve the basic controls of your foot’s joints rotations. We will achieve this by upgrading the basic foot chain to support a more functional toe control and by changing some of the default constrain types. The basic idea is to switch the required orient constraints with aim constraints, then add an extra controller to the aiming of the original foot’s ball joint
It is important to remember that specularity is a reflection of a light source. Therefore, if a light is bright enough to create an optical effect, a specular highlight from that light should also create an optical effect. Maya allows for this via the use of Shader Glow.
By Steven Stahlberg. This could be the single biggest hurdle in realistic cg since Gouraud shading… 🙂
…as for me, I’ve been wrestling with this since -95. Like many others, I’ve been extremely frustrated by it, mainly cause until about -00 very few knew much about it, and no one could answer my questions. So -99 I found my own home-made method, a pragmatic approach that sidesteps simulation. (When we have the software and the power to do nice simulating, of course we should, but until then this kind of ‘kludgy’ approach might serve ok.) My terminology is astronomy-based, because it’s clearer and more concise: Dayside = Where light hits. Nightside = Where light doesn’t reach. Terminator = The transitional zone between night and day.
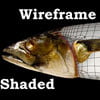
Many of the 3D-artists at least once faced the need or desire to make the wireframe rendering. And they asked questions like: How to render wireframe in V-Ray or Mental Ray? How to perform the isoline render? How to make a shaded mesh rendering? How make a post production to a wireframe rendering? These are the questions this tutorial will answer and will show the easy and usable ways of creating model’s mesh renderings.

Shelf Customizing for Polygonal Modeling
SubD-modeling is the same as polygon-modeling in Maya, workflow-wise. But polygon-modeling in Maya is trickier than in some other packages, here are a few tips that may make it easier. We want to create a special shelf for the tools we use the most, we want to keep it fairly clean and not over-crowd it, so we can find the items quickly, and have a small learning curve.
In this tutorial Kevin shows you the set up a a simple dog skeleton. You will cover: * Joint Tool. * Remove Joint Tool. * Add Joint Tool. * Edit Joints. * Set rotation Limits and more… Dog scene file included, thx to Kurt for the model.
All lights in Maya (area light excluded) emanate light from a finite point in space. This is completely unnatural as all lights in nature have a measurable size. The effect that light size has in nature is found in the shadow and specular qualities present. Simulating this issue in a render is for a separate discussion, as we are now going to focus on a particular situation where the finite origin of a spotlight becomes problematic… not in how objects receive light, but how one controls the origin of light.

Simulating – Subsurface Scattering
Simulating Subsurface-Scattering with Maya/Mental Ray. First of all I have to say that there are two ways (or maybe even more !) to simulate Subsurface scattering. You could use a real material-volume-shader and a few sampler/light-info nodes and a lot of time for tweaking and tuning! Pros: maybe a better look. Cons: very slow, new calculation for each frame, complex setup. So…. ‘I did it my way!’ and this one is pretty fast and easy to setup!
Tessellation by Alex Alvarez. When Maya renders a NURBS surface, the object is tessellated into triangles (polygons). Understanding tessellation is crucial to clean silhouettes and patch boundary relationships. There are several options for tessellation, but this quick tutorial is dealing with multi-patch models.
Realistic skin is hard to fake because it’s both an artistic and a technical challenge. It’s artistic because you can almost feel a character’s personality through the look of its skin; its wrinkles, colors and beauty spots. But it’s also a technical test, because skin isn’t like a homogeneous material that has simple physical properties – it’s composed of several different layers. However, we always model it as a perfectly even thin surface, which is why it’s so hard to get good results.

Texture Mapping – Dealing with Surface Parameterization
Dealing with Surface Parameterization by Alex Alvarez. If your somewhat new to texture mapping, you should read up a little on parameterization as it often causes a bit of confusion. Basically, remember this: just because two surfaces look identical in regards to the number and placement of spans in u and v, it does not mean that a texture map will wrap itself around the surfaces in the same way.
Texture Resolution by Alex Alvarez. A common question when new to texture mapping, is what resolution should textures be? This is assuming that you are going to be making your own in a 2D package, such as Photoshop, either from scratch or from a scan.
1000 Skies… Not a tutorial but, a site filled with high resolution full 360 degree skies up to 14,000 pixels wide for Broadcasters, Architectural Renderers, Illustrators, Animators and Photographers. Seamless, panorama domes big enough for high resolution output.
The proceeding animation shows the result of animating a searchlight sweeping in front of a blasted wall. Light rays enter the room as shadows are cast into the fog volume. Be aware that volume shadow occlusion only works with depth-map shadows. This creates problems if you have transparency mapped objects, as is the case with the wall. So, how can we get an object with a transparency map to cast accurate shadows without raytracing? (i.e. depth-map shadows).
Note: Not a Maya Tutorial but, useful to Maya users.
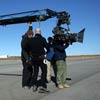
This is an attempt to explain the live action shooting process for VFX supervisors. Many people trained in 3D and Compositing have never stepped foot onto a tv or film set and it can be quite unnerving. Whilst there’s nothing like experience I hope this guide can help smooth out some of the jargon and complexities.
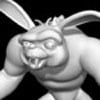
In this Video Tutorial you will learn how to model a Zombie Bunny a cool character check it out and it’s Free
# | A | B | C | D | E | F | G | H | I | J | K | L | M | N | O | P | Q | R | S | T | U | V | W | X | Y | Z
