Save for the Web Adobe Photoshop Image Tutorial – Optimizing Images
How to resize images and reducing file sizes for your Websites content with Adobe Photoshop and Image Ready. Editing images to load faster in Web browsers. If your images take too long to load then you could loose visitors so, it is best to optimize all of the images and graphics on your Website. Optimization will improve your web ranking as well. For beginners to intermediate. This tutorial is for creating copies of your graphics for use on the Web, not for final saving of your originals.
For this tutorial you will need a basic understanding of Adobe Photoshop and is intended for beginners to intermediate users.
*Tip: Where ever you see: (Ctrl+S) or (Ctrl+Shift+N) or something similar, these are “Keyboard Shortcuts” or “Key Strokes” By holding down these key combinations together they will manifest different commands. It is a good practice to use them when you can, they will become second nature and speed up your workload.
1. Open up the image that you want to resize. File> Open. (Ctrl/Command +O)
2. From the “Image” drop down menu, select Image Size. Select Image Size (Alt+Ctrl+I)
3. Type in the desired Width and Height. To resize the Width and Height evenly, check the Constrain Proportions box.
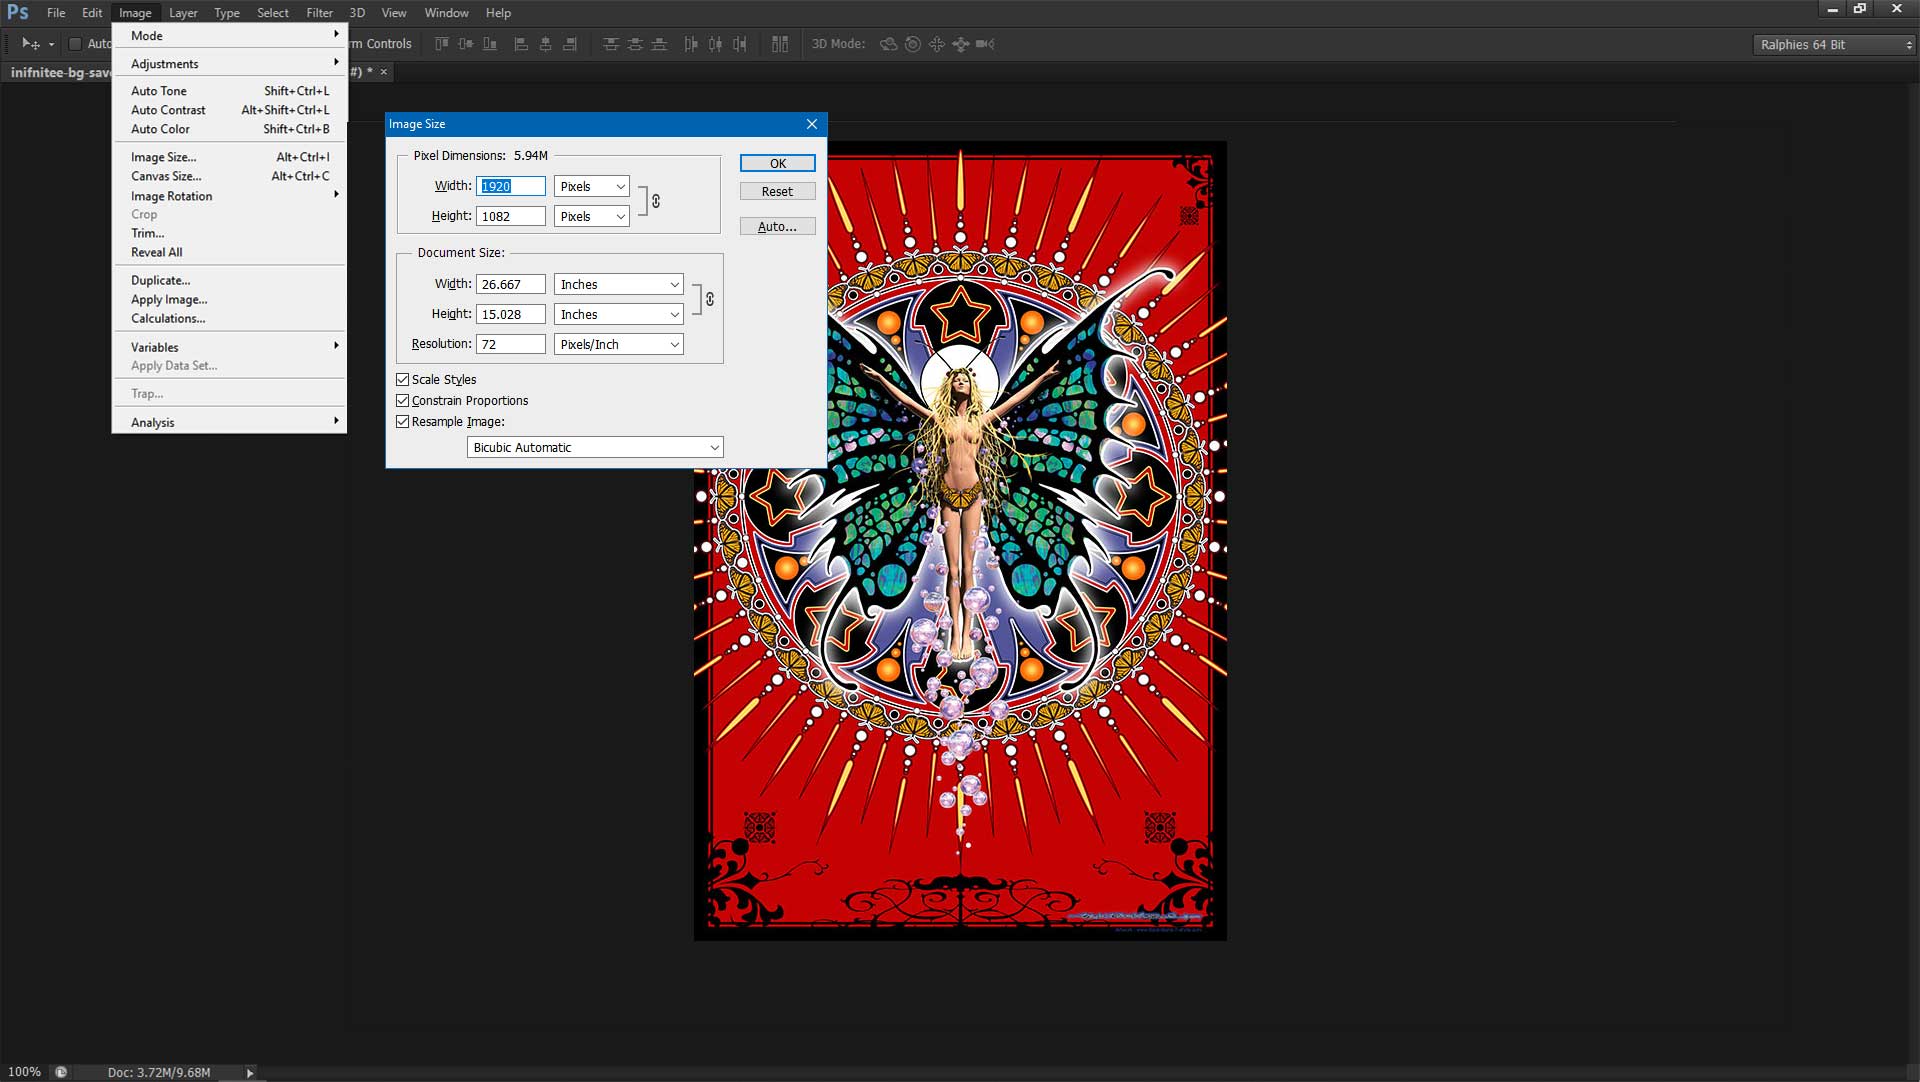
Opening and Resizing image.
Optional Sharpening
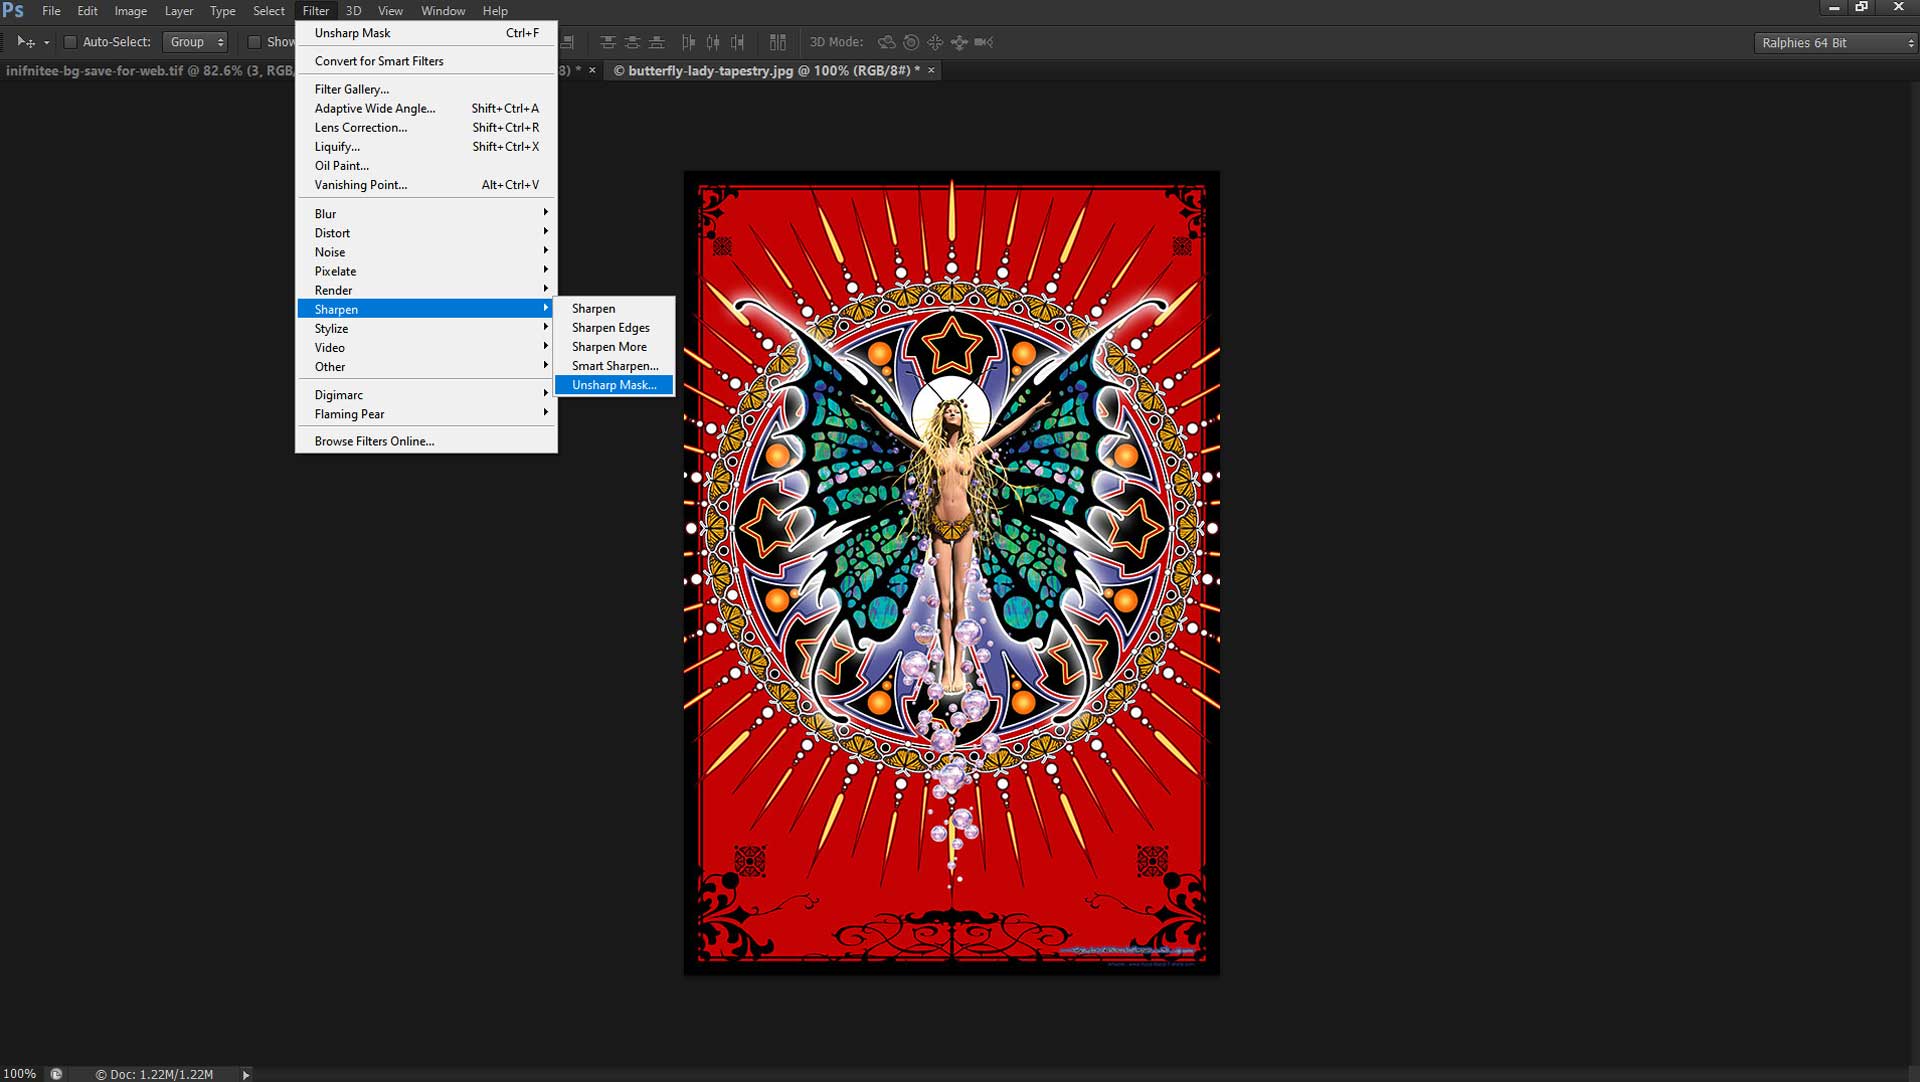
From the “Filters” drop down menu select Sharpen> Unsharp Mask.
 Unsharp Mask." width="1200" height="676" srcset="https://www.infinitee-designs.com/wp-content/uploads/2022/03/inifnitee-bg-save-for-web-2.jpg 1920w, https://www.infinitee-designs.com/wp-content/uploads/2022/03/inifnitee-bg-save-for-web-2-300x169.jpg 300w, https://www.infinitee-designs.com/wp-content/uploads/2022/03/inifnitee-bg-save-for-web-2-800x451.jpg 800w, https://www.infinitee-designs.com/wp-content/uploads/2022/03/inifnitee-bg-save-for-web-2-1817x1024.jpg 1817w, https://www.infinitee-designs.com/wp-content/uploads/2022/03/inifnitee-bg-save-for-web-2-768x433.jpg 768w, https://www.infinitee-designs.com/wp-content/uploads/2022/03/inifnitee-bg-save-for-web-2-1536x866.jpg 1536w, https://www.infinitee-designs.com/wp-content/uploads/2022/03/inifnitee-bg-save-for-web-2-600x338.jpg 600w" sizes="(max-width: 1200px) 100vw, 1200px">
Using the “Unsharp Mask” filter.
In the “Unsharp Mask” setting pop up window use sliders or type in these settings:

Radius: 0.5
Threshold: 255
*Tip: This step should not be applied to small size changes. If you see too much highlighting happening then you can skip this step.
*Tip: The “Sharpening” step will sharpen your images very slightly but, will make a difference in the clarity of your images.
Save for the Web
From the “File” drop down menu, select Save for the Web or, (Alt+Shift+Ctrl+S)
1. Select the “Optimized” tab.
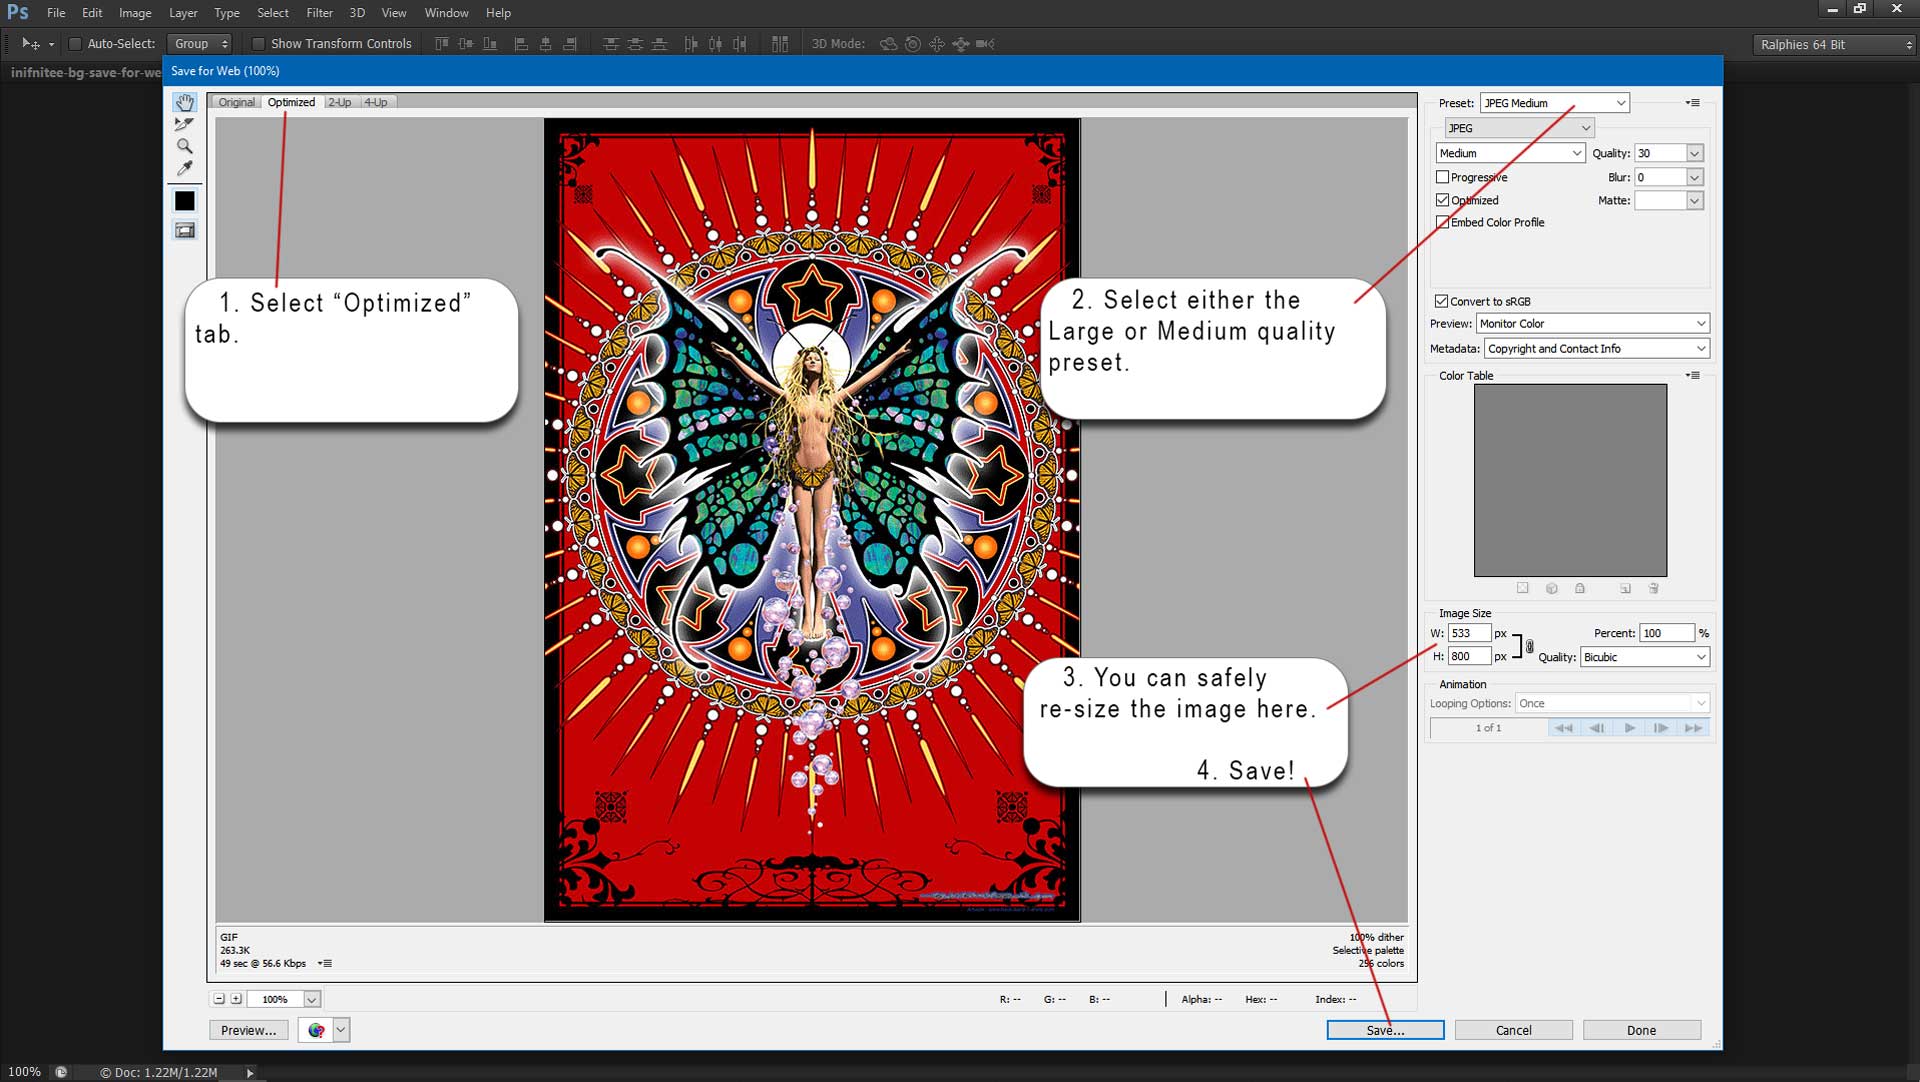
Save for the Web settings.
2. Select either the Large or Medium quality preset.
2a. Select either Low, Medium or High. These options will alter the file size as well as the quality so, look carefully at the outcome before choosing one. (I find that “Medium” works fine for Web quality and file size)
2b. Select either jpeg, gif or png. (jpeg is for images with color gradients in them and Gif is best for images with solid colors and PNG is best for images with transparency) Try them and look at the differences as well as the file sizes that different setting create.
2c. Leave all other settings as their default.
4. Click on “Save” In the “Save Optimized As” pop up window, find the folder that you wish to save your image in and hit Save. You can now upload the image to you website and it will bee much smaller in file size yet, still be of good quality
That’s it! The secrets to creating images for your Websites that look good and load fast! I hope you enjoyed this tutorial and if you have any questions, please feel free to contact us.