3D Butterfly Tutorial 2 – Importing Models and Adding Photorealistic Textures in Bryce 3D
The Bryce 3D Interface  The Bryce 3D Interface, some of the buttons, palettes and editing tools. | Edit Attributes Palette
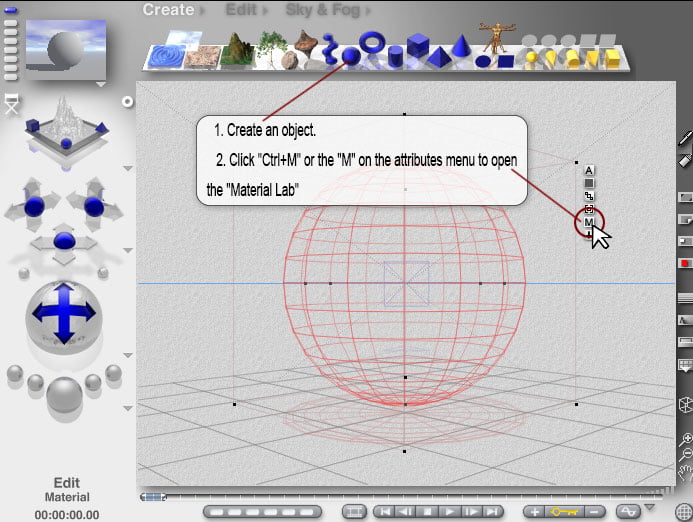
| ||||||||||

Open Bryce 3D. Click the “View” arrow ![]()

Click Create and select the Symmetrical Lattice then click the “E” ![]() in the Attributes Palette to open the Terrain Editor.
in the Attributes Palette to open the Terrain Editor.
Import Alfa image and set depth

Terrain Editor Setup
1. With “Elevation” selected and highlighted, click the New button ![]() .
.
2. Click the Grid button ![]() and in the drop down menu select “512 – ultra fine.
and in the drop down menu select “512 – ultra fine.
3. Click the Down Arrow button ![]() just under the Grid button and in the drop down menu select “Solid”, “Smooth” and “Keep Gradient” You will need to click the Down Arrow button
just under the Grid button and in the drop down menu select “Solid”, “Smooth” and “Keep Gradient” You will need to click the Down Arrow button ![]() to make each selection.
to make each selection.
3D Butterfly Tutorial 2 – Import Alfa image and set depth

Terrain Editor Setup
1. Select “Pictures” Above the first pictures window select “Load” then in the lower left corner select ‘Copy”
2. In the second pictures window select “Paste” and click “Apply”
3. Click and hold the bottom of the “Elevation Slider Bar” and drag it upwards to the middle of the scale.
4. Click and hold the top of the “Elevation Slider Bar” and drag it down to the middle of the scale. Click the “Check Mark”
* Tip: It is a very good practice to press Ctrl+S often to save your projects.
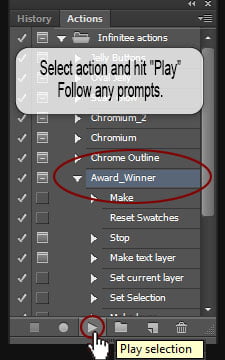
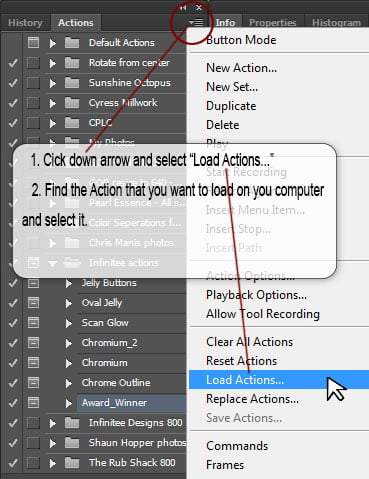
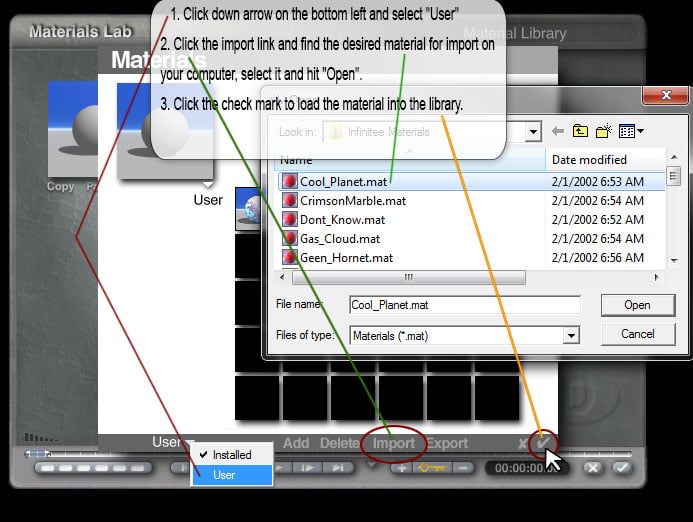
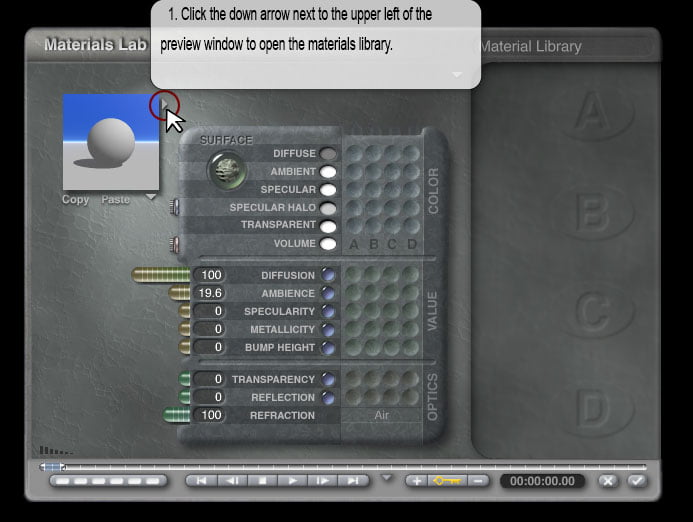
3D Butterfly Tutorial 2
< Prev 1 2 3 4 5 6 7 8 9 Next >