Part 7 – Finishing the 3D Butterfly’s Legs with the Symmetrical Lattice and the Bryce 3D Terrain Editor
Creating the Right Legs
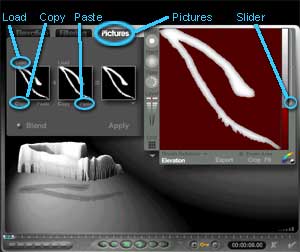
Repeat the steps that you did to create the Left Legs to create the Right Legs. (Part.5)
1. Follow the same steps for modeling the Right Legs as you did with the Left Legs except, use the RightAlfa.psd and Right Texture.psd images.
2. Once you have created the Right Leg, click the "A" 

3. With the Right Leg still selected, click the "Edit Family" button 

Lower Right Leg Object Attributes
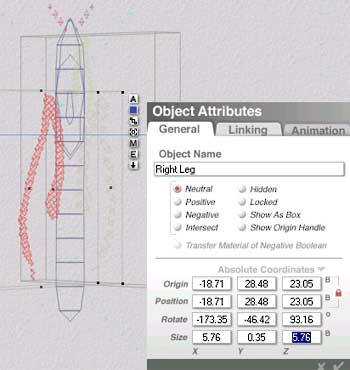
Lower Right Leg Attributes
Origin X: -18.71, Y: 28.48 and Z: 23.05
Rotate X: -173.35, Y: -46.42 and Z: 93.16
Size X: 5.76, Y: 0.35 and Z: 5.76
Lower Right Leg Object Attributes Settings
Duplicating and Positioning Legs
1. Place cursor/pointer ![]() over the right "X" axis, press and hold Ctrl., the "Rotate" icon will appear
over the right "X" axis, press and hold Ctrl., the "Rotate" icon will appear 


2. Place cursor/pointer ![]() over the top "Y" axis, press and hold Ctrl, the "Rotate" icon will appear
over the top "Y" axis, press and hold Ctrl, the "Rotate" icon will appear 


3. Click the "A" 

4. Click the "Edit Family" button 

Upper Right Leg Object Attributes
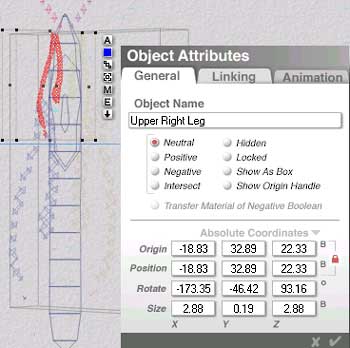
Upper Right Leg Object Attributes…
Origin X: -18.83, Y: 32.89 and Z: 22.33
Rotate X: -173.35, Y: -46.42 and Z: 93.16
Size X: 2.88, Y: 0.19 and Z: 2.88
Apply Above Attributes to the Leg Object
4. Click the "Edit Family" button 

5. With the Upper Leg still selected, hold down Ctrl and click ![]() the lower Left Leg. In the pop up window list, hold cursor
the lower Left Leg. In the pop up window list, hold cursor ![]() over the the Left Leg and while holding down Ctrl+Shift and click to select both legs together.
over the the Left Leg and while holding down Ctrl+Shift and click to select both legs together.
6. Once both legs are selected, hit the Group button ![]() ,
,
7. Click the "A" 
< Prev 1 2 3 4 5 6 7 8 9 Next >


