Learn How to Model a Head and Render a Photorealistic Woman’s Face
Angie 3D Portrait Tutorial – 3D Photorealistic Portrait of “Angie”
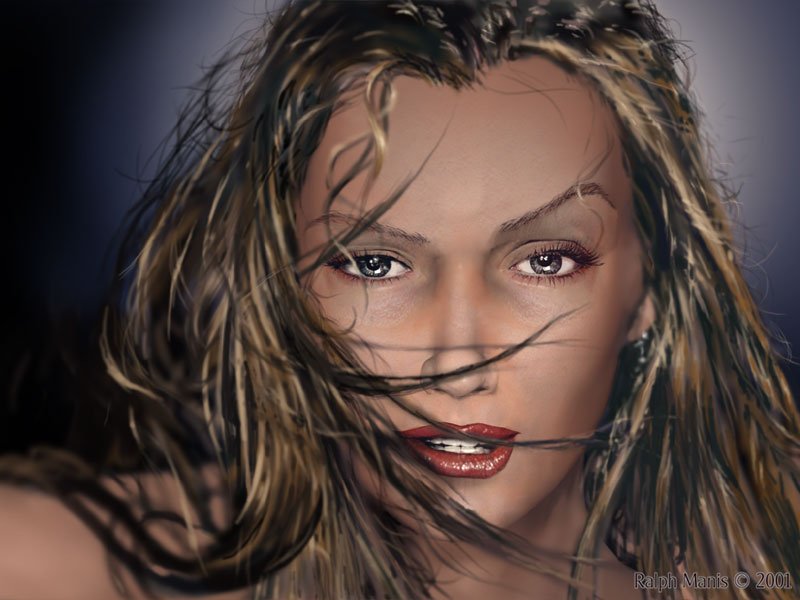
Angie 3D Portrait Tutorial – In this tutorial you will learn how to model a realistic head, add photo realistic textures to the face and paint perfect hair using Poser, Bryce 3D and Photoshop.
For this tutorial you will need a basic understanding of Poser, Bryce 3D and Adobe Photoshop, Paint Shop Pro or any other digital painting program. These techniques can be applied with other similar programs but, were written for these in particular. A note to intermediate and advanced users: I tried to make this tutorial as comprehensive and detailed as possible for new users. Please bare this in mind when the explanations seem a bit obvious and repetitive.
*Tip : Where ever you see: (Ctrl+S) or (Ctrl+Shift+N) or something similar, these are “Keyboard Shortcuts” or “Key Strokes” By holding down these keyboard combinations together, they will manifest different commands. It is a good practice to use them when ever you can. In time they will become second nature and speed up your work flow.
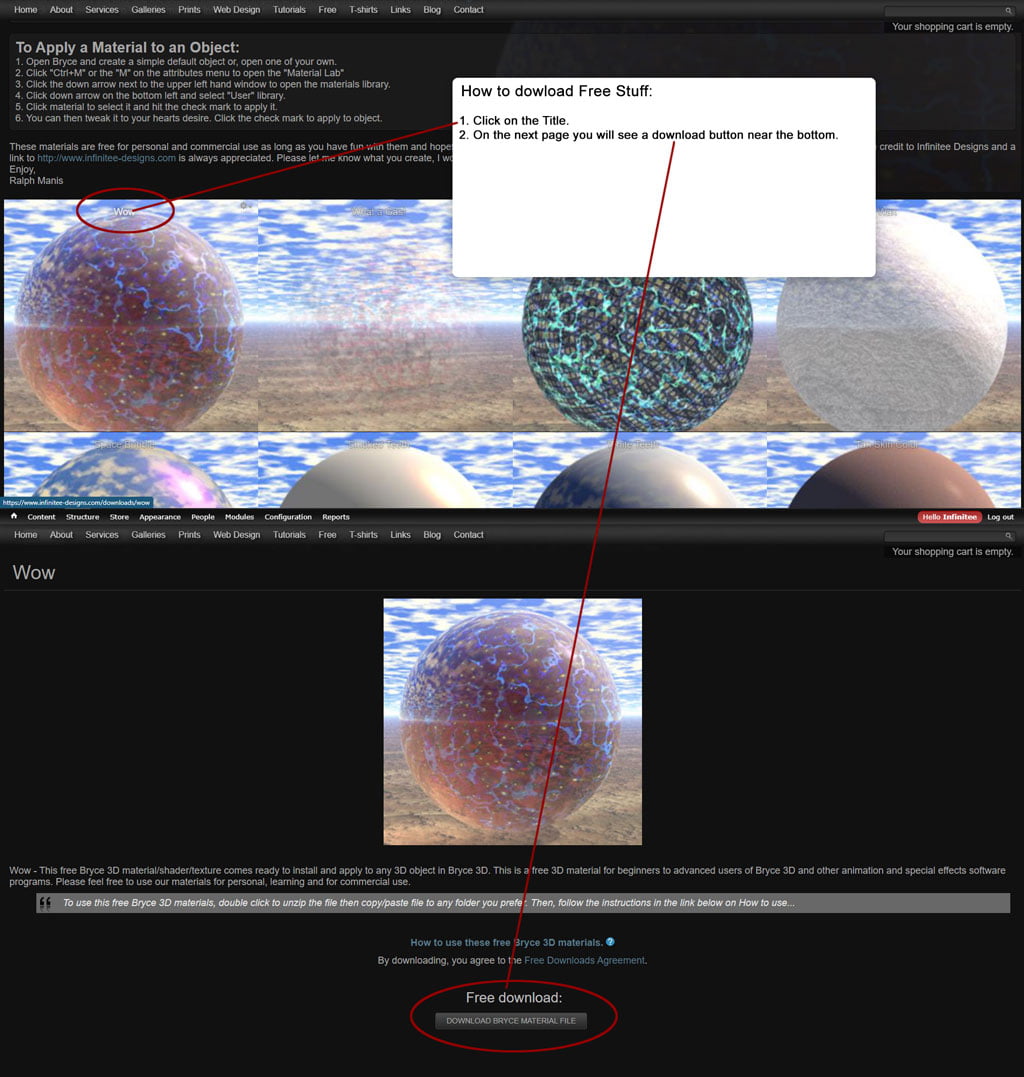
You may download the entire model with texture maps here or other models from the Bryce free downloads page.
Angie 3D Portrait Tutorial – This tutorial and image is featured in these fine publications:
- “Femmes 3D” by Richard Maillot
- “Femme Digitale” by Michael Burns
- “The Best of 3D Graphics” by Vic Cherubini
- “3D Artists Guide to Real Word Applications” by Patricia Waterman
Modeling in Poser, Creating a UV Map, Using photos and painting in Photoshop
Modeling the Head and Facial Features with Poser

The Poser Interface
Feel free to work from your own photographs and create your own poses.
1. Open Poser and select a female figure then select the “Face Camera” from the camera controls drop down menu or click on the small gray head. 

2. Select File > Export As Wavefrount Object. In the Export Range pop up menu select: Single frame and OK. In the Hierarchy Selection pop up menu uncheck: Ground and Hair then OK. Name the file: Head.obj Save file and close Poser.
*Tip: When using the “Parameter Dials” make your adjustments in small increments. If you don’t like an adjustment hit: Ctrl+Z to undo the last input.
Creating and Editing the UV Map Without the Hair
You will need the free UV Mapper Classic for the next part of this tutorial.

1. Open UV Mapper then: File > Load Model or (Ctrl+L) > find and select Head.obj.
2. If you saved your “Head” model without hair then ![]() Select: Edit > Color > Black and White then: File > Save Texture Map (Ctrl+T) and OK. Name it: UVMap.bmp, save and close the UV Mapper.
Select: Edit > Color > Black and White then: File > Save Texture Map (Ctrl+T) and OK. Name it: UVMap.bmp, save and close the UV Mapper.
2a. Optionally you may want to separate your body parts into groups. This will make it easier to select the individual parts in Photoshop with “Select Color Range” To do this select: Edit > Color > by Group then: File > Save Texture Map (Ctrl+T) and OK. Name it: UVMap.bmp, save and close the UV Mapper.
*Tip: Pay no attention to the fact that the UV Map does not look like it has the facial expressions (morphs) that you applied to your model in Poser.
*Tip: You can Select: Edit > Color > By Group to separate the body parts by color making it easier to distinguish them apart from each other.
UV Mapping (with hair)

Grouping individual parts by color.
If you import the hair with your model your UV Map may look a little like a mess. What you are seeing is a UV map of the hair on top of all the other parts. To select and move the hair out of the way:
1. ![]() Select: Edit> Color> by Group. (See image above)
Select: Edit> Color> by Group. (See image above)
2. ![]() Select> By Group (Command G)> Select the hair or what ever part is on top of the rest. (See image below)
Select> By Group (Command G)> Select the hair or what ever part is on top of the rest. (See image below)
3. ![]() Either resize by holding the cursor over one of the resize handles (in the corners and on the sides of the selection box) and move it to fit some where out of the way or move it off the page completely.
Either resize by holding the cursor over one of the resize handles (in the corners and on the sides of the selection box) and move it to fit some where out of the way or move it off the page completely.
4. Edit> Save Texture Map.
5. Open Photoshop or any Paint program and open up your UV Map in a new page.
*Tip: The body parts will look distorted due to the three dimensional model being flattened into a 2D image. You will paint over or apply your photos to the areas that will be in your final image. This process is explained in detail later in the tutorial.
*Tip: Having the many parts in separate colors will make them easier to define and select. When you are done with the body parts you may want to rerun the UV map process again to create a map for the hair.
Selecting the Hair UV Map

16. Follow the same steps for the wing to create the “Butterfly Leg” images. You will only need to make one. You can duplicate it in Bryce to make the rest.
16a. Select: Filters> Blur> Gaussian Blur. Set Radius to 5. This will smooth and round edges in Bryce.
*Tip: The more Gaussian Blur that you add to your Alfa images the more rounded they will be when modeled in Bryce.
*Tip: You should have an one original image, one Wing Texture, one Wing Alfa, one Body Texture, one Body Alfa, one Antenna Texture, one Antenna Alfa, one Leg Texture and one Leg Alfa.
Next- Part 2 “Utilizing Photos and Painting in Adobe Photoshop”

